Firebase is a powerful platform developed by Google that provides a suite of tools and services to help developers build high-quality apps quickly and efficiently. Integrating Firebase into your Android project can unlock features like real-time databases, authentication, cloud storage, and analytics. In this guide, we’ll walk you through the entire process of setting up Firebase in Android Studio, complete with screenshots and step-by-step instructions.
Table of Contents
- Introduction
- Prerequisites
- Creating a Firebase Project
- Adding Firebase to Your Android Project
- Configuring Firebase Services
- Testing Your Firebase Integration
- Troubleshooting Common Issues
- Conclusion
Introduction
Firebase offers a comprehensive suite of cloud-based tools designed to enhance your app’s functionality and scalability. By integrating Firebase into your Android app, you gain access to a range of services including real-time databases, authentication mechanisms, cloud storage, and analytics.
In this guide, we’ll cover the essential steps to integrate Firebase with your Android project using Android Studio. Whether you’re building a new app or integrating Firebase into an existing project, this guide will provide the detailed instructions you need.
Prerequisites
Before you start, make sure you have the following prerequisites:
- Android Studio Installed: Ensure that you have Android Studio installed on your computer. You can download it from the official Android Studio website.
- Google Account: A Google account is necessary to access Firebase services. If you don’t have one, you can create it here.
- Basic Knowledge of Android Development: Familiarity with Android Studio and basic Android development concepts will be helpful.
- An Existing Android Project: You should have an Android project set up in Android Studio. If you don’t have one, you can create a new project by selecting
Start a new Android Studio projectfrom the Android Studio welcome screen.
Creating a Firebase Project
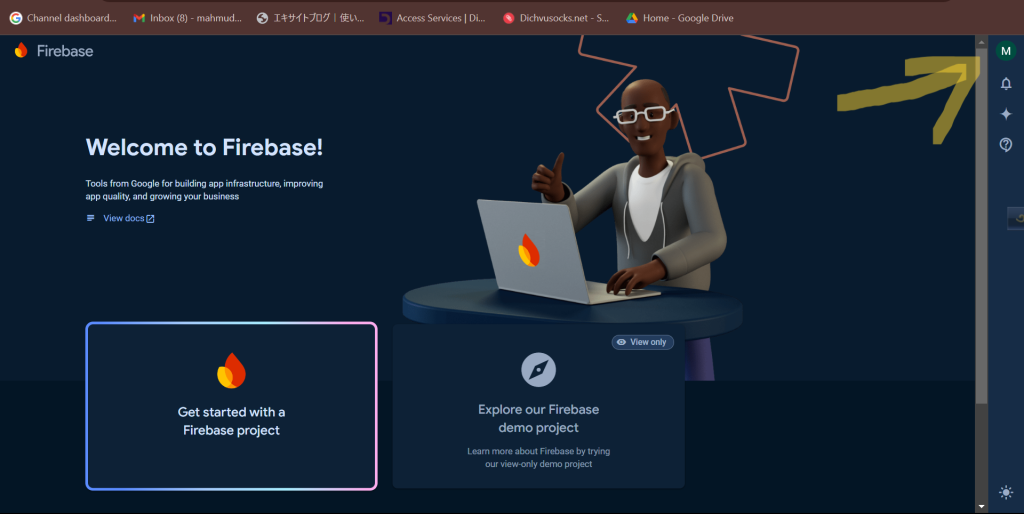
- Sign in to Firebase:
- Open your web browser and navigate to the Firebase Console.
- Sign in with your Google account.

- Create a New Project:
- Click on the “Add project” button
- Enter your project name and select your Google Analytics preferences. Analytics helps track user behavior and interactions within your app.
- Click “Create project” and wait for the setup process to complete

- Add Firebase to Your Android App:
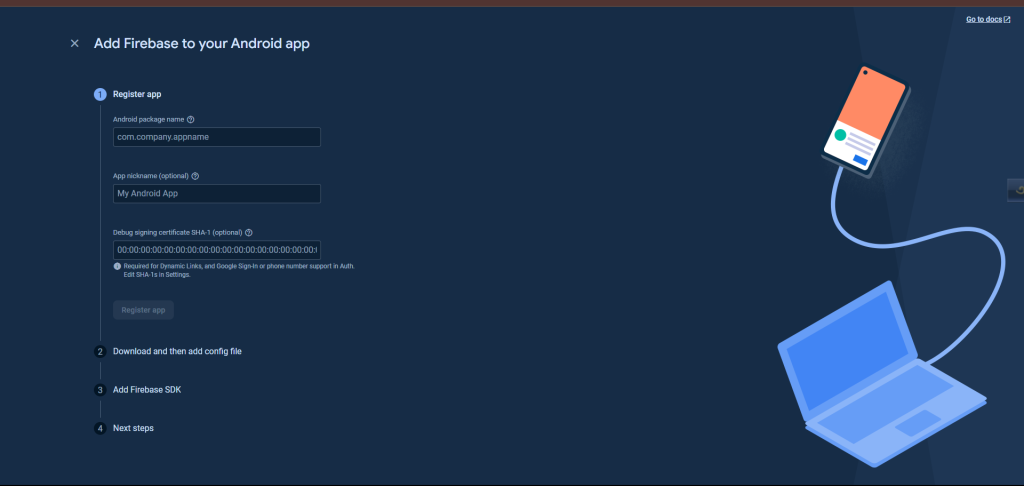
- In the Firebase project dashboard, click on the Android icon to add an Android app to your Firebase project.
- Enter your app’s package name (found in your Android project’s
AndroidManifest.xmlfile). - Optionally, you can also enter the app nickname and SHA-1 certificate fingerprint, though these fields are not mandatory.
- Click “Register app.”

- Download the
google-services.jsonFile:
- After registering your app, download the
google-services.jsonfile. This file contains all the configuration details needed for Firebase to communicate with your Android app. - Save this file to your project’s
appdirectory.
Adding Firebase to Your Android Project
- Add Firebase SDK Dependencies:
- Open Android Studio and navigate to your project’s
build.gradle(Project) file.
// In your project-level build.gradle file
buildscript {
    repositories {
        google()
        mavenCentral()
    }
    dependencies {
        classpath 'com.google.gms:google-services:4.3.15'
    }
}

allprojects {
    repositories {
        google()
        mavenCentral()
    }
}
- Next, open your app-level
build.gradlefile and add the Firebase SDK dependencies.
   // In your app-level build.gradle file
   plugins {
       id 'com.android.application'
       id 'com.google.gms.google-services'
   }

   android {
       // Your existing configuration
   }

   dependencies {
       // Add Firebase SDK dependencies
       implementation 'com.google.firebase:firebase-analytics:21.0.0'
}- Make sure to sync your project with Gradle files by clicking the “Sync Now” button in Android Studio.
- Initialize Firebase in Your App:
- Open the
Applicationclass of your app or create one if it doesn’t exist.
   import android.app.Application;
   import com.google.firebase.FirebaseApp;

   public class MyApplication extends Application {
       @Override
       public void onCreate() {
           super.onCreate();
           FirebaseApp.initializeApp(this);
       }
}- Ensure that your
AndroidManifest.xmlfile registers this application class.
   <application
       android:name=".MyApplication"
       ...>
       <!-- Other configurations -->
   </application>
Configuring Firebase Services
Depending on your app’s needs, you can configure various Firebase services. Here’s how to set up some of the most popular ones:
- Firebase Authentication:
- Go to the Firebase Console and select your project.
- Click on “Authentication” in the left-hand menu.
- Enable the authentication methods you want to use (e.g., Email/Password, Google Sign-In).
- In your Android app, add the necessary dependencies to
build.gradle:
implementation 'com.google.firebase:firebase-auth:21.0.0'- Implement authentication logic in your app. For example, to authenticate users with email and password:
   FirebaseAuth mAuth = FirebaseAuth.getInstance();

   // Register a new user
   mAuth.createUserWithEmailAndPassword(email, password)
       .addOnCompleteListener(this, task -> {
           if (task.isSuccessful()) {
               // Registration success
           } else {
               // Registration failed
           }
});- Firebase Realtime Database:
- Click on “Realtime Database” in the Firebase Console.
- Create a new database and configure your rules.
- Add the necessary dependencies to
build.gradle:
implementation 'com.google.firebase:firebase-database:20.0.0'- Use the Realtime Database in your app:
   DatabaseReference mDatabase = FirebaseDatabase.getInstance().getReference();

   // Write data to the database
mDatabase.child("users").child(userId).setValue(user);- Firebase Cloud Storage:
- Click on “Storage” in the Firebase Console.
- Set up your Cloud Storage rules and bucket location.
- Add the dependency to
build.gradle:
implementation 'com.google.firebase:firebase-storage:21.0.0'- Use Cloud Storage in your app:
   FirebaseStorage storage = FirebaseStorage.getInstance();
   StorageReference storageRef = storage.getReference();

   // Upload a file
   StorageReference fileRef = storageRef.child("images/photo.jpg");
   fileRef.putFile(fileUri)
       .addOnSuccessListener(taskSnapshot -> {
           // Upload success
       })
       .addOnFailureListener(exception -> {
           // Upload failed
       });
Testing Your Firebase Integration
- Run Your App:
- Build and run your app on an emulator or physical device to ensure that the Firebase integration is working correctly.
- Check Firebase Console:
- Monitor the Firebase Console for real-time data updates and analytics.
Troubleshooting Common Issues
- Google Services JSON Missing or Incorrect:
- Ensure that the
google-services.jsonfile is placed in the correct directory (appfolder) and contains the correct configuration.
- Dependency Issues:
- Verify that all Firebase dependencies in your
build.gradlefiles are correct and up-to-date. Sync your Gradle files after making changes.


